Replaces


Frequently bought together
Part Details
Returns: Parts with electrical components cannot be returned once installed.
Attention California Customers:
 WARNING: This product can expose you to chemicals including Di(2-ethylhexyl)phthalate (DEHP), which is known to the State of California to cause cancer, and birth defects or other reproductive harm. For more information, go to www.P65Warnings.ca.gov.
| Quantity | Part | Brand | Replaces OE Number |
|---|---|---|---|
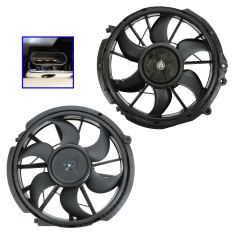
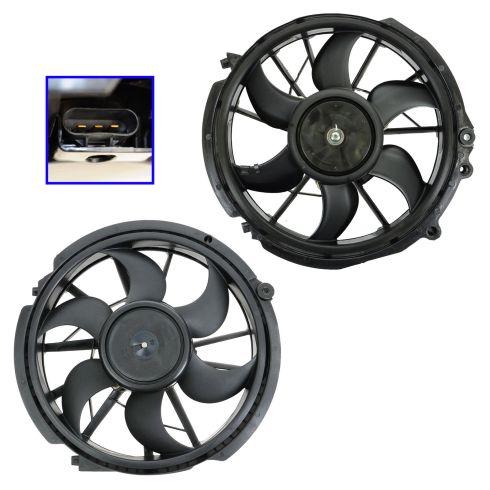
| 1 | 1996-07 Ford Taurus Mercury Sable Passenger Side A/C Condenser Cooling Fan Assembly TRQ RFA83135 RFA86799 | TRQ | FO3115106, 674-00323R, 620-105, 600310, 330-55010-001, 3F1Z8C607EA, RFA83135 |
| 1 | Ford Taurus Mercury Sable Engine Cooling Fan Assembly TRQ RFA83257 RFA86799 | TRQ | FO3115107, 674-00324L, 620-106, 674-00366L, 674-00862L, 330-55010-002, F8DZ8C607AC, RFA83257 |
Lifetime Warranty
This item is backed by our limited lifetime warranty. In the event that this item should fail due to manufacturing defects during intended use, we will replace the part free of charge. This warranty covers the cost of the part only.
Returns: Parts with electrical components cannot be returned once installed.
FREE Shipping is standard on orders shipped to the lower 48 States (Contiguous United States). Standard shipping charges apply to Hawaii and Alaska.
Shipping is not available to a P.O. Box, APO/FPO/DPO addresses, US Territories, or Canada for this item.
Expedited is available on checkout to the United States, excluding Alaska, Hawaii.
Final shipping costs are available at checkout.
Created on:
Tools used
Brought to you by 1AAuto.com, your source for quality replacement parts, and the best service on the internet. Hi. I'm Mike Green. I'm one of the owners at 1AAuto. I want to help you save time and money repairing and maintaining your vehicle. I'm going to use my 20 plus years' experience restoring and repairing cars and trucks like this, to show you the correct way to consult parts from 1AAuto.com. The right parts installed correctly. That's going to save you time and money. Thank you and enjoy the video.
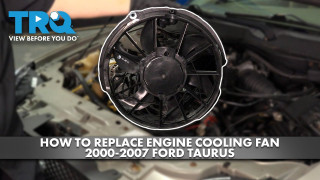
In this video we are going to remove and reinstall the radiator fans in this 2001 Ford Taurus. The fans didn't need repaired in this car. I'm just doing the video to show you how to take them out and put them in. The only tools you'll need are an 8mm socket and ratchet and a flat blade screwdriver. We're going to disconnect the battery here using an 8mm socket. You'll want to use a regular screwdriver. There is two tabs, you'll want to pull out on the tab, and pull up on this fuse box. This will just go up and out of the way a little bit. You'll see there is an 8mm bolt right here. You can see right down there is a plug for your radiator fan. All you're going to do is pry out lightly here and pull that plug off. You want to pull these pins. You can see here's one of the pins out. Pull these pins out of the fan shroud. Okay. We'll kind of speed through that process of unplugging the fan and removing the harnesses from the clips, and then finish out removing the 8mm bolt. Get this up out of the way. Pull this fan up. That just comes out of the bottom. Lift it out.
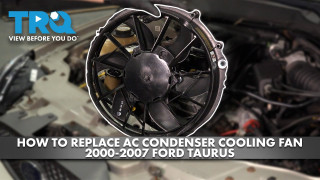
With this fan I've done the same thing. I already loosened this bolt. I've already unplugged it. I'm just going to take that bolt off. I'm going to pull it out. Then I'm going to slide over to where this other fan came from. It's going to be a fight with all the wiring. Slide it up and out. Slide this on over. It has two feet that have basically a cross pattern on it. If you look down in you can see right there, that cross right there, that's where one of the feets goes. Then that cross right down there is where the other one goes. You put the fans down in, and you kind of just work them back and forth a little bit. You find where they go down in, and then that 8mm bolt lines up. Then tighten up that bolt. Tighten up this 8mm bolt. Reconnect the wiring harnesses for the fan. Make sure everything's routed correctly. Put the fuse block back into place, reconnect the battery, and you should be all set. The second fan, slide it down in, just pull the wiring out the way kind of. The same thing on the feet. This goes down in here into place. Tighten up your 8mm bolt. This back into place now, and then the pins connect them. Put the harnesses back into their places. Connect the battery one more time. You should be all set.
We hope this helps you out. Brought to you by www.1AAuto.com, your source for quality replacement parts, and the best service on the internet. Please feel free to call us toll free at 888-844-3393. We're the company that's here for you on the internet and in person
We are a caring, passionate team of auto enthusiasts who are here to help, If you have a question about our parts or a repair, please call 1-888-844-3393 between 8 AM & 9:30 PM M-F and 8 AM & 4 PM Sat. and Sun. (EST).
In stock orders ship same-day when ordered by 4 PM ET. Need your parts faster? We also offer expedited shipping at checkout.