How to Replace Sway Bar Links 2002-06 Nissan Altima
Created on: 2013-12-16
This video shows you how to replace the sway bar links on your 02-06 Nissan Altima. You can learn how to do it yourself with help from 1A Auto.
-
step 1 :Remove the wheel
- Loosen the lug nuts with your 19 mm socket and breaker bar
- Raise and secure the vehicle
- Remove the lug nuts and set the wheel aside.
-
step 2 :Remove the sway bar links
- Hit the bolts with penetrating oil.
- Use a 17 mm socket and 19 mm wrench to remove the bolt on each end of the sway bar link.
-
step 3 :install the new sway bar link
- Feed your sway bar link into place.
- Thread the nuts and bushings.
- Tighten up both bolts with your 17 mm socket and 19 mm wrench.
-
step 4 :put your wheel back on
- Hand tighten the lug nuts
- Lower the vehicle
- Torque your lug nuts in a star pattern to 100 ft lbs.
Tools needed
-
1/2 Inch Breaker Bar
17mm Socket
19mm Socket
19mm Wrench
Flat Blade Screwdriver
Floor Jack
Hammer
Jack Stands
Ratchet
Torque Wrench
While 1A Auto strives to make the information provided in this video as accurate as possible, it makes no claims, promises, or guarantees about the accuracy, completeness or applicability of the content. No information contained in this video shall create any expressed or implied warranty or guarantee of any particular result. All do-it-yourself projects entail some risk. It is the sole responsibility of the viewer to assume this risk. 1A Auto is not responsible or liable for any loss damage (including, but not limited to, actual, consequential, or punitive), liability, claim, or any other injury or cause related to or resulting from any information posted in this video.
Brought to you by 1AAuto.com, your source for quality replacement parts and the best service on the internet. Hi, I'm Don from 1AAuto, I hope this how-to video helps you out, and the next time you need a part for your vehicle, think of 1AAuto.com. Thanks.
In this video, we show you how to replace a sway bar link on this 2003 Nissan Altima. It's the same process on these Altimas from 2002 to 2006. We show you how to replace the passenger side sway bar link, but it's the same process on the driver's side. The items you'll need for this is a new sway bar link from 1AAuto.com, flat blade screwdriver; 17mm, 19mm, and 21mm sockets and ratchet with a breaker bar or a piece of pipe for some extra leverage; a 19mm wrench, a hammer, jack and jack stands, and depending on the condition of your vehicle you may also need a torch. Start off by removing your wheel. If you don't have air-powered tools, you're going to want to loosen the lug nuts while the vehicle's on the ground, then jack it up and remove them the rest of the way. You'll want to douse the studs on the end of the links in penetrating oil. There's a 17mm nut to remove there, and then another 17mm nut right down here.
Put a 19mm wrench on the back, and then using your 17mm socket and ratchet and a piece of pipe or a breaker bar for some extra leverage, you want to just try to break that bolt free and remove it. Because of the condition of our bolt, however, we're forced to use a torch to heat it up so that we can remove it, but once it's heated up, we can remove it with the 19mm wrench and the 17mm socket. Then on this lower bolt, same thing, use a 19mm wrench in the middle there, and then use your 17mm socket and the breaker bar or piece of pipe. Again we have no luck with it and have to use a torch. Again, once it's heated up, it comes right out. Once those nuts are removed, that sway bar will pull right off. You can see in the back is the old sway bar link, and in the front is the new one from 1AAuto. You can see it's identical, and it will mount exactly the same. Feed your sway bar link up and into place and push those studs through those holes. Twist on the 19mm nuts that came with your sway bar. Then tighten both of those up until they're nice and firm. Replace your wheel, hubcap, and lug nuts. Tighten the lug nuts preliminarily, lower the vehicle, and tighten them the rest of the way. Then you want to torque the lug nuts in a crossing pattern to 100 foot pounds.
We hope this video helps you out. Brought to you by 1AAuto.com, your source for quality replacement parts and the best service on the internet. Please feel free to call us toll-free 888-844-3393. We're the company that's here for you on the internet and in person.
Shop Products


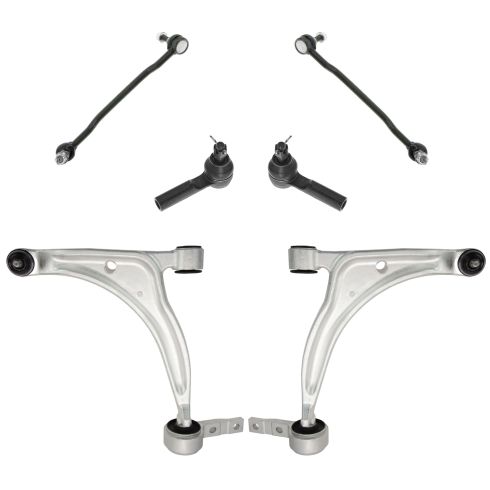
Nissan Altima Maxima Front 6 Piece Steering & Suspension Kit TRQ PSA59268
Part Details:
- 6 Piece
- (2) Front Sway Bar Links
- (2) Front Lower Control Arms with Ball Joints
- (2) Front Outer Tie Rods

How to Replace Sway Bar 1997-2005 Chevy Venture
Watch this video to learn how to replace the sway bar links on your 97-05 Chevy Venture. The process is similar for other GM vehicles as well.
While 1A Auto strives to make the information provided in this video as accurate as possible, it makes no claims, promises, or guarantees about the accuracy, completeness or applicability of the content. No information contained in this video shall create any expressed or implied warranty or guarantee of any particular result. All do-it-yourself projects entail some risk. It is the sole responsibility of the viewer to assume this risk. 1A Auto is not responsible or liable for any loss damage (including, but not limited to, actual, consequential, or punitive), liability, claim, or any other injury or cause related to or resulting from any information posted in this video.
